High Performance and Native Printing
|
Design Perference
(File->Design Perference)
SmartCodeStudio can print in three modes depending on the printer drivers
selected.
-
Normal (WYSIWYG)
-
High Performance (Graphics, WYSIWYG)
-
High Performance (Native)
Normal (WYSIWYG)
This mode is will work with most third party printer drivers. For
every label that is printed, SmartCodeStudio will send the entire graphics
data to the driver.
This mode has the advatange of obtaining a printout that look like what you see
on the screen.
High Performance (Graphics, WYSIWYG)
This mode is available only when SmartCodeDrivers are used.
In this mode, static objects are cached as bitmaps and stored in the
printer. Only data that are changed in subsequent labels are sent to
the printer. and this results in a big reduction in the
printing time for a set of labels.
This mode, like the Normal mode above, produces WYSIWYG output, but
gives much better performance.
High Performance (Native)
This mode is available only when SmartCodeDrivers are used.
The Native mode gives the best performance in terms of printing speed and
quality. Objects are sent as native commands to the printer instead of
graphics. For example, when printing a barcode, SmartCodeStudio sends a command
describing the barcode (type, data and dimensions) to the printer,
rather than a series of black and white bars.
When a barcode is set with a density, this printing mode produces barcode
printouts that are highly scannable.
Not all objects have a corresponding native command on the
printer. Objects not printed as native commands will be emulated with
graphics. Some native objects may also not look exactly like those on the
screen, resulting in a slight difference between the screen and the
printout.
When designing a label with this mode, you have the option to turn on the
High Performance Native View described below.
This view helps you to distinguish between native and
graphics objects that will be sent to
the printer.
(View->High
Performance Native View)
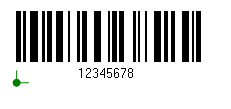
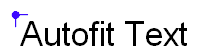
In High Performance Native View, objects are shown with a blue or green dots
beside them. An object with a blue dot indicates it will be printed as graphics,
while an object with a green dot means the object will be printed as a native
commands. The dot also represents the anchor point of the object used for
measurement and alignment in SmartCodeStudio.
(File->Print Perference)
In the file menu, you can set the print preference to Prompt One Label
at a time or Prompt All Labels. The print
preference applies only to documents that contain prompt
objects (i.e. Barcodes or Texts that have datasource set to Prompt).
If Prompt One Label is set, the labels will be
printed one at a time. This cause the printer to print and eject one
label once the data for one label has been entered.
If Prompt All Labels is set, printing will start
only when the data for all the labels have been fully entered.
|